📖 Lesson content
Summary
A typical prompt evaluation workflow follows a systematic approach to objectively measure and improve your prompts. While there are many different ways to assemble these workflows and various open source and paid tools available, understanding the core process helps you start small and scale up as needed.
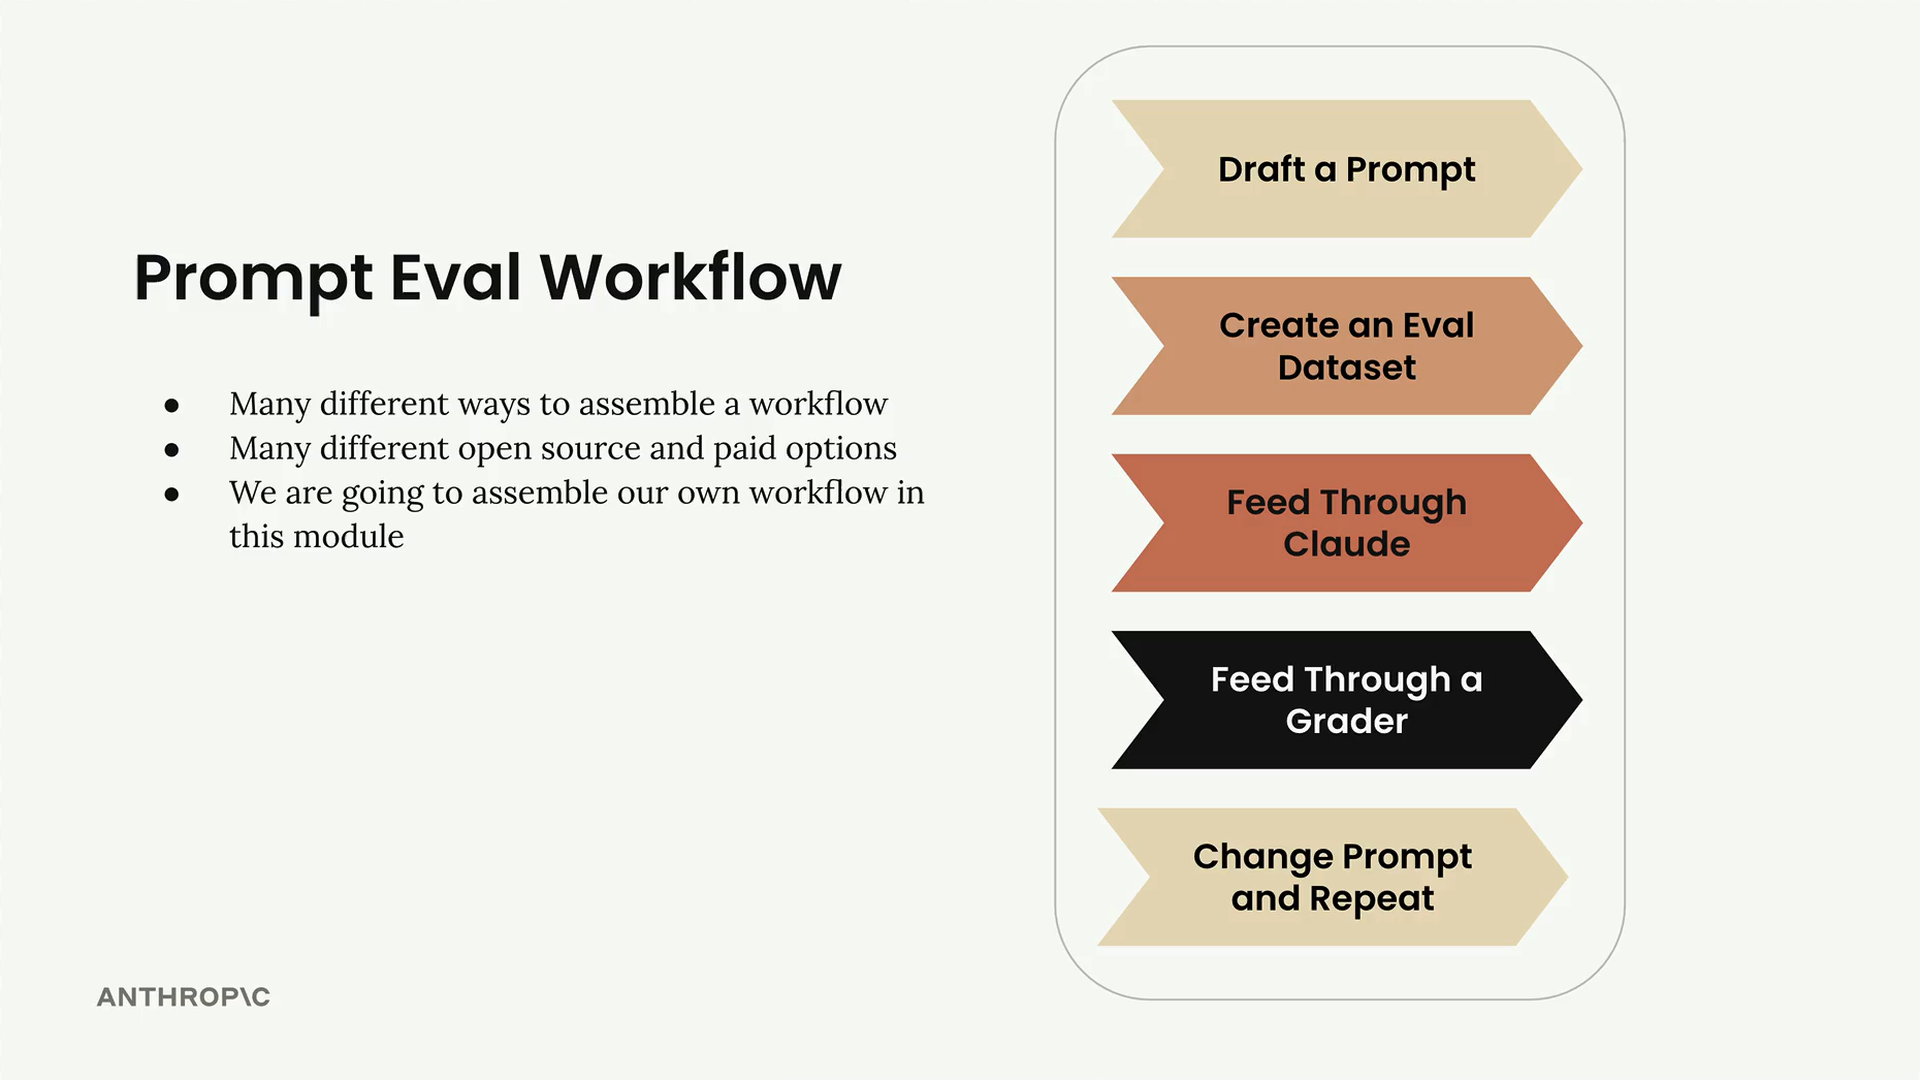
Step 1: Draft Your Initial Prompt
Start by writing out a basic prompt that you want to improve. For this example, we'll use a simple prompt structure:
prompt = f"""
Please answer the user's question:

{question}
"""
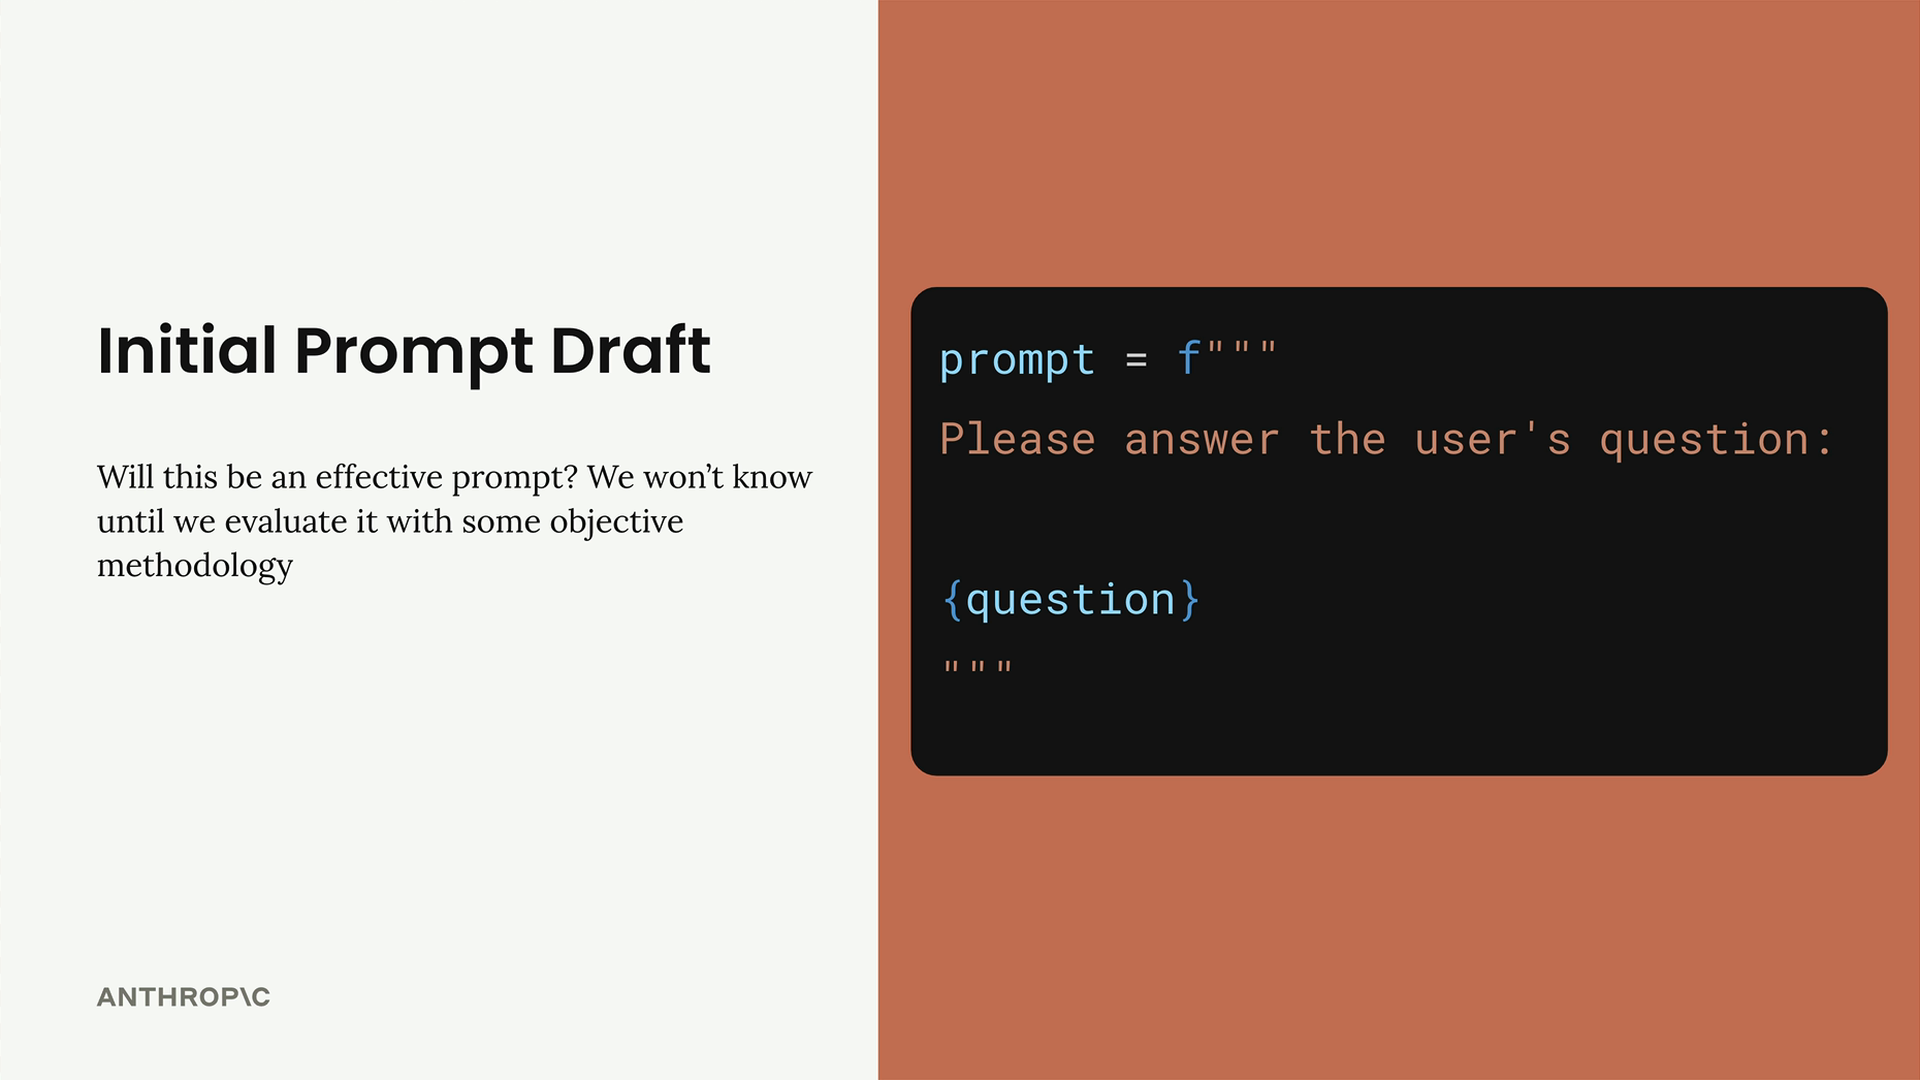
This gives us a baseline to work from. We won't know if it's effective until we evaluate it with some objective methodology.
Step 2: Create an Evaluation Dataset
Your evaluation dataset contains sample inputs that you'll feed into your prompt. Since our prompt only has one input (the user's question), we need a collection of different questions to test with.
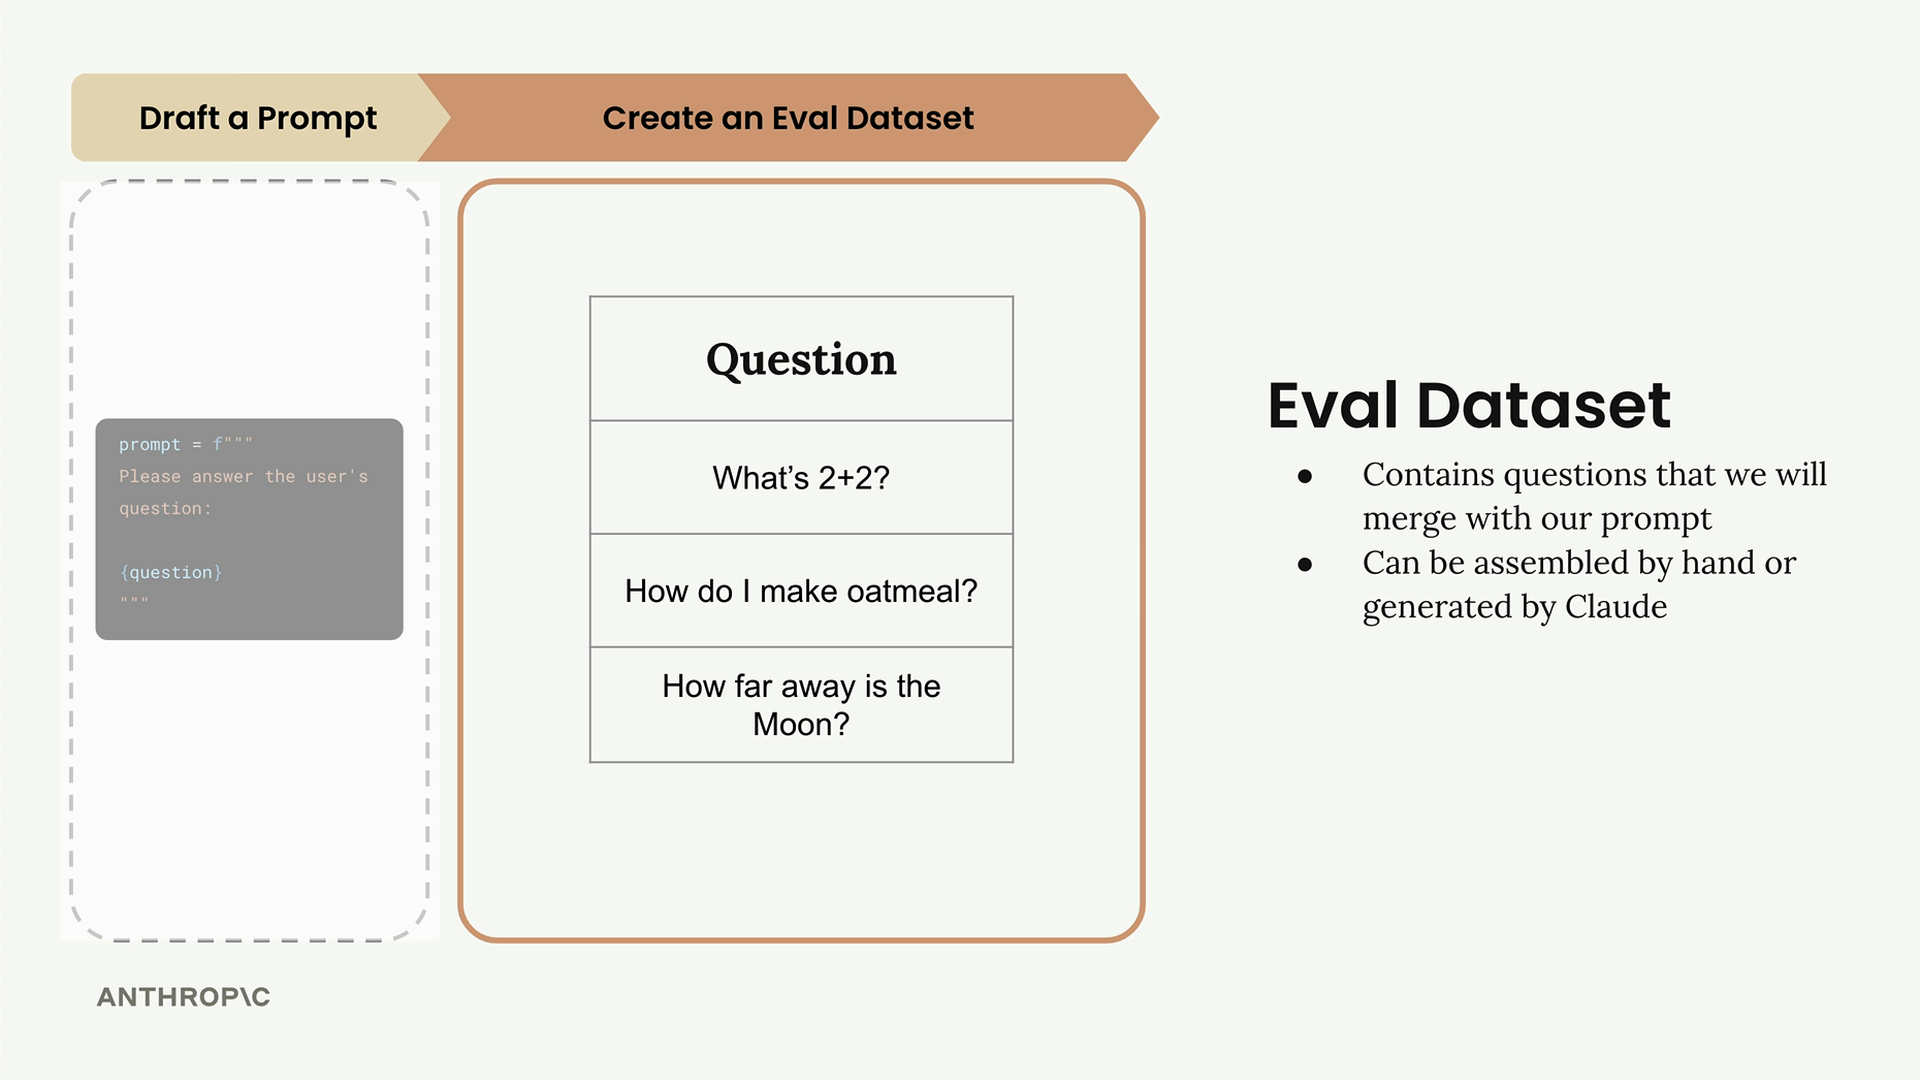
The dataset contains questions that we will merge with our prompt. You can assemble these datasets by hand or generate them using Claude. In real-world evaluations, you might have tens, hundreds, or even thousands of different records, but we'll start with just three questions for this example:
- What's 2+2?
- How do I make oatmeal?
- How far away is the Moon?
Step 3: Feed Through Claude
Take each question from your dataset and merge it with your prompt template to create complete prompts. Then send each one to Claude and collect the responses.
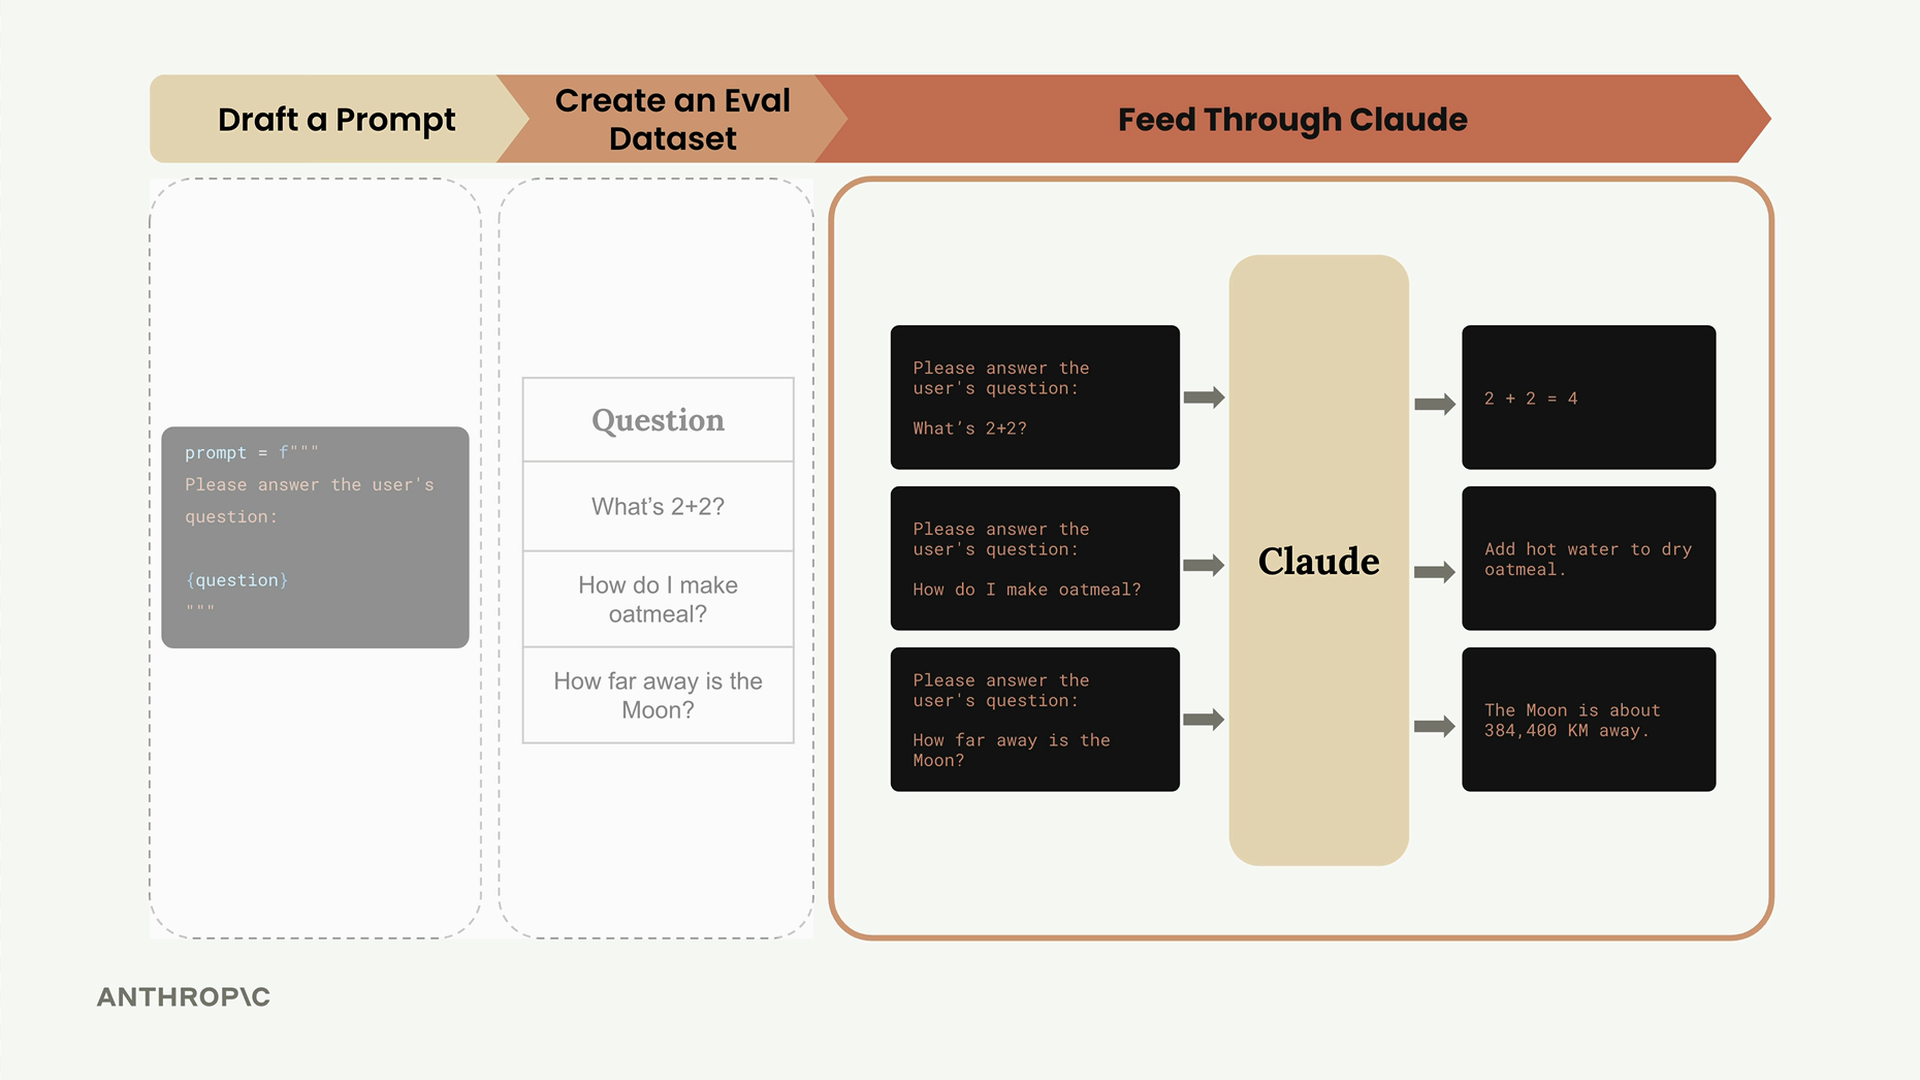
For example, the first question becomes a complete prompt that Claude can respond to. You'll repeat this process for all records in your dataset, getting back responses like "2 + 2 = 4", detailed oatmeal instructions, and information about the Moon's distance.
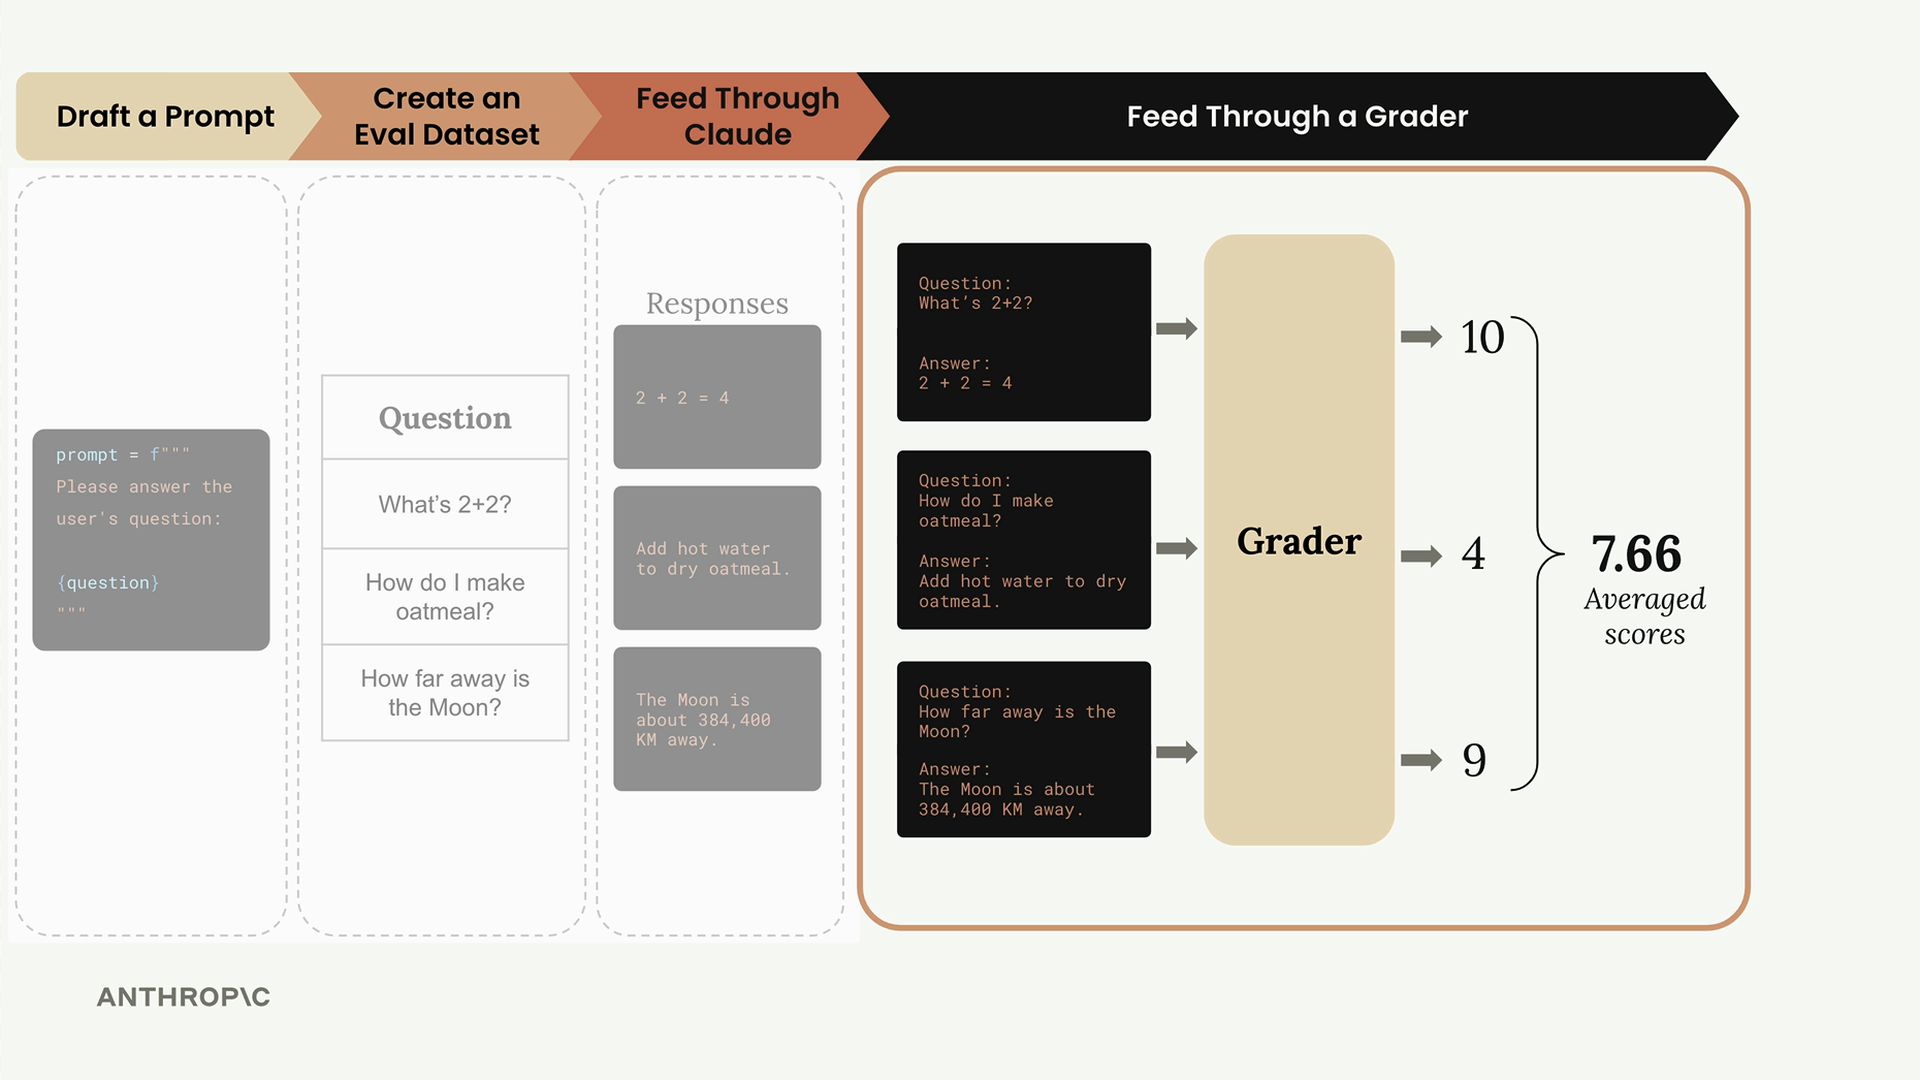
Step 4: Feed Through a Grader
Now comes the crucial step: objectively scoring Claude's responses. Take each question-answer pair and feed them into a grader that will evaluate the quality of Claude's response.
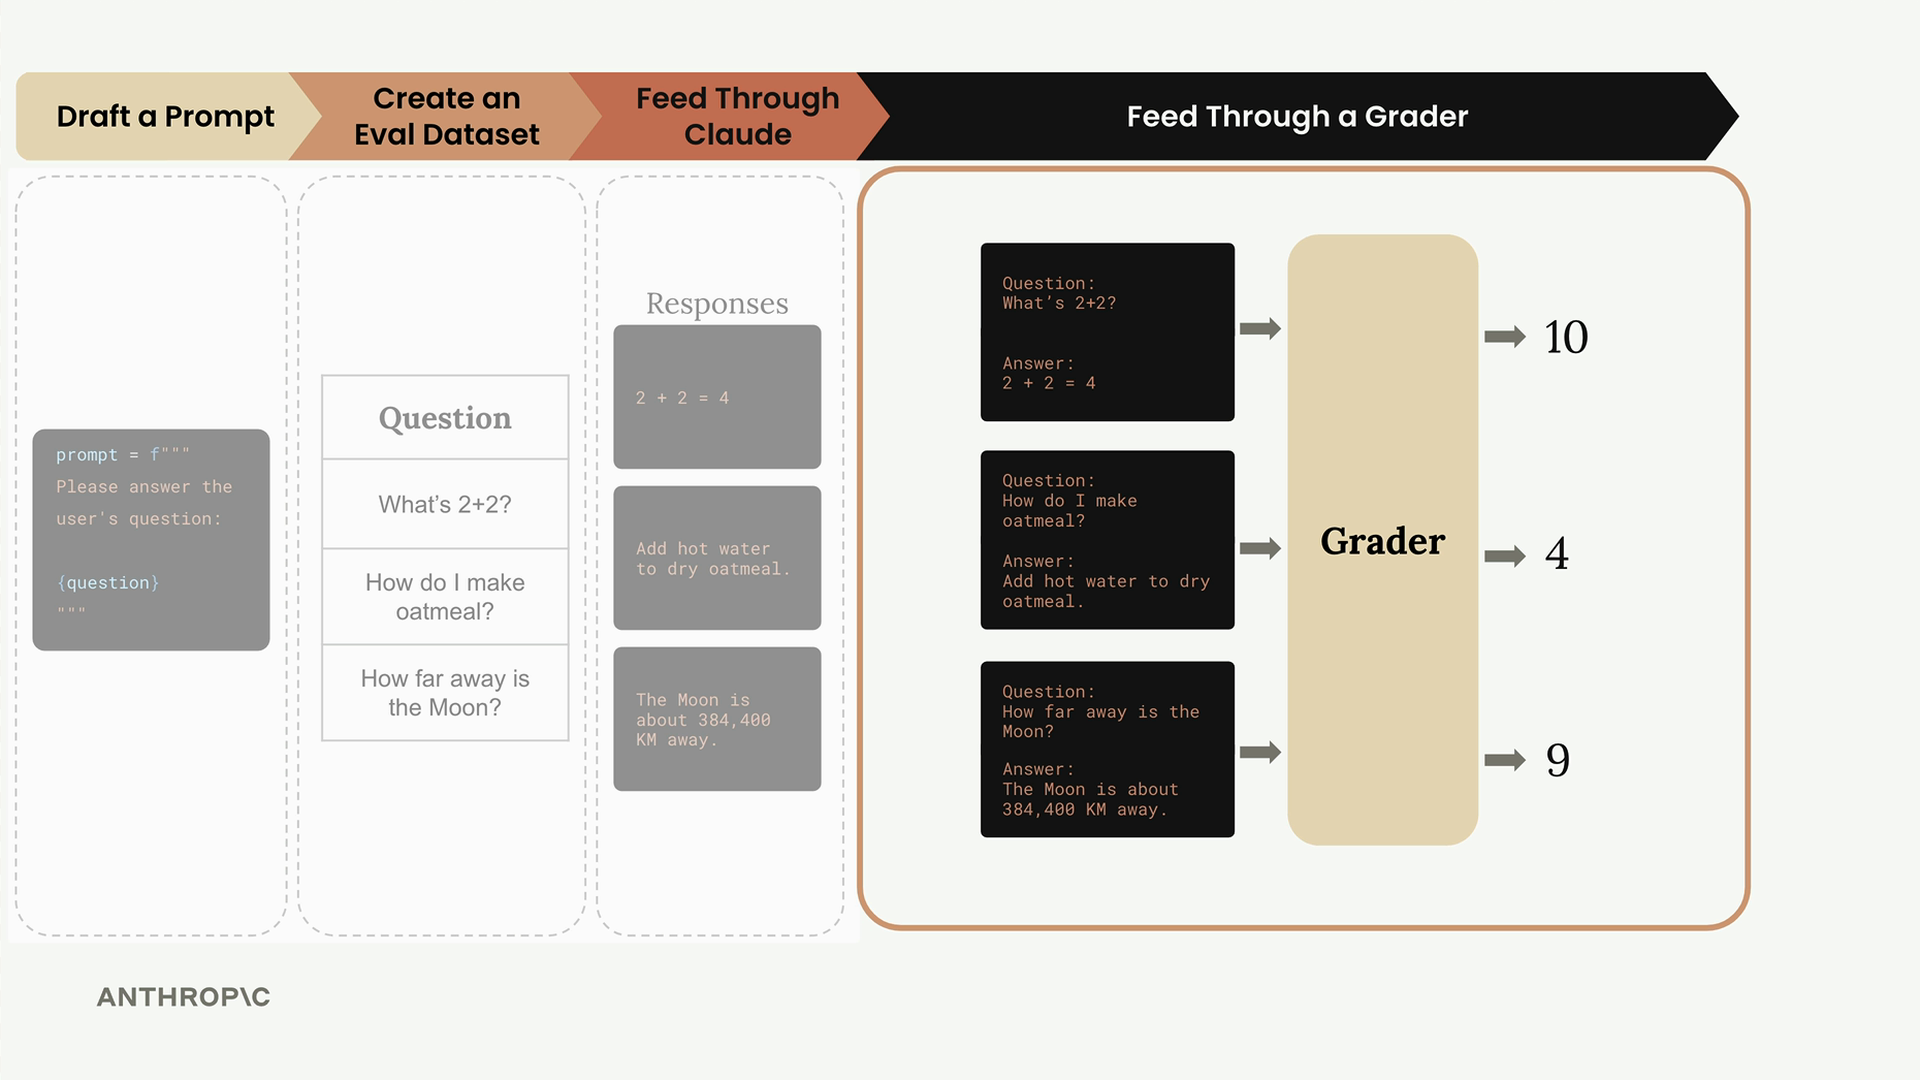
The grader assigns scores (typically 1-10) based on response quality:
- 10 = Perfect answer, no room for improvement
- 4 = Definitely room for improvement
- 1 = Poor or incorrect response
In our example, the responses might score 10, 4, and 9 respectively. Average these scores together to get an overall performance metric: 7.66.
Step 5: Change Prompt and Repeat
With your baseline score established, you can now iterate on your prompt. Try adding more specific instructions to guide Claude's responses:
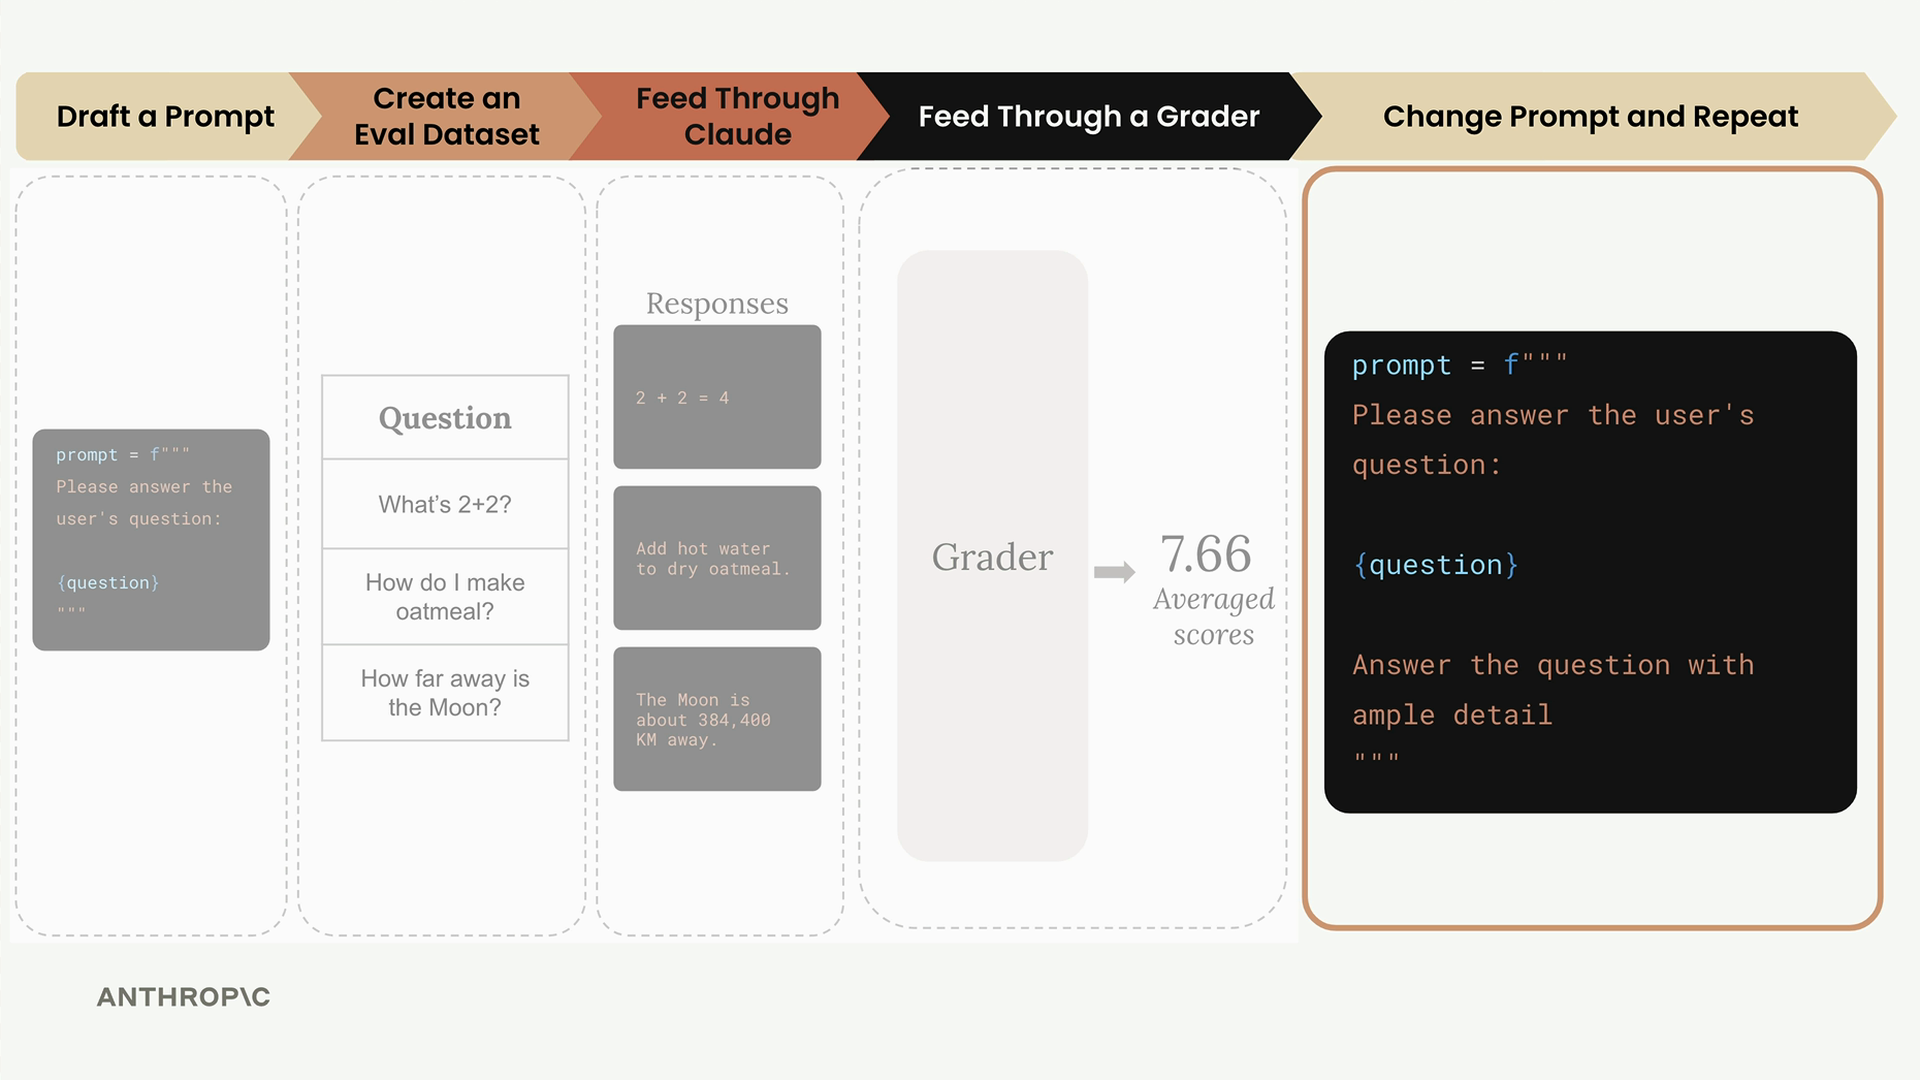
prompt = f"""
Please answer the user's question:

{question}

Answer the question with ample detail
"""
Run this improved prompt through the entire evaluation pipeline again. Compare the scores to see which version performs better.
Prompt Scoring and Iteration
The power of this workflow lies in getting objective measurements for each prompt version. You can compare scores across different iterations and use the version with the best performance, or continue iterating to find even better approaches.
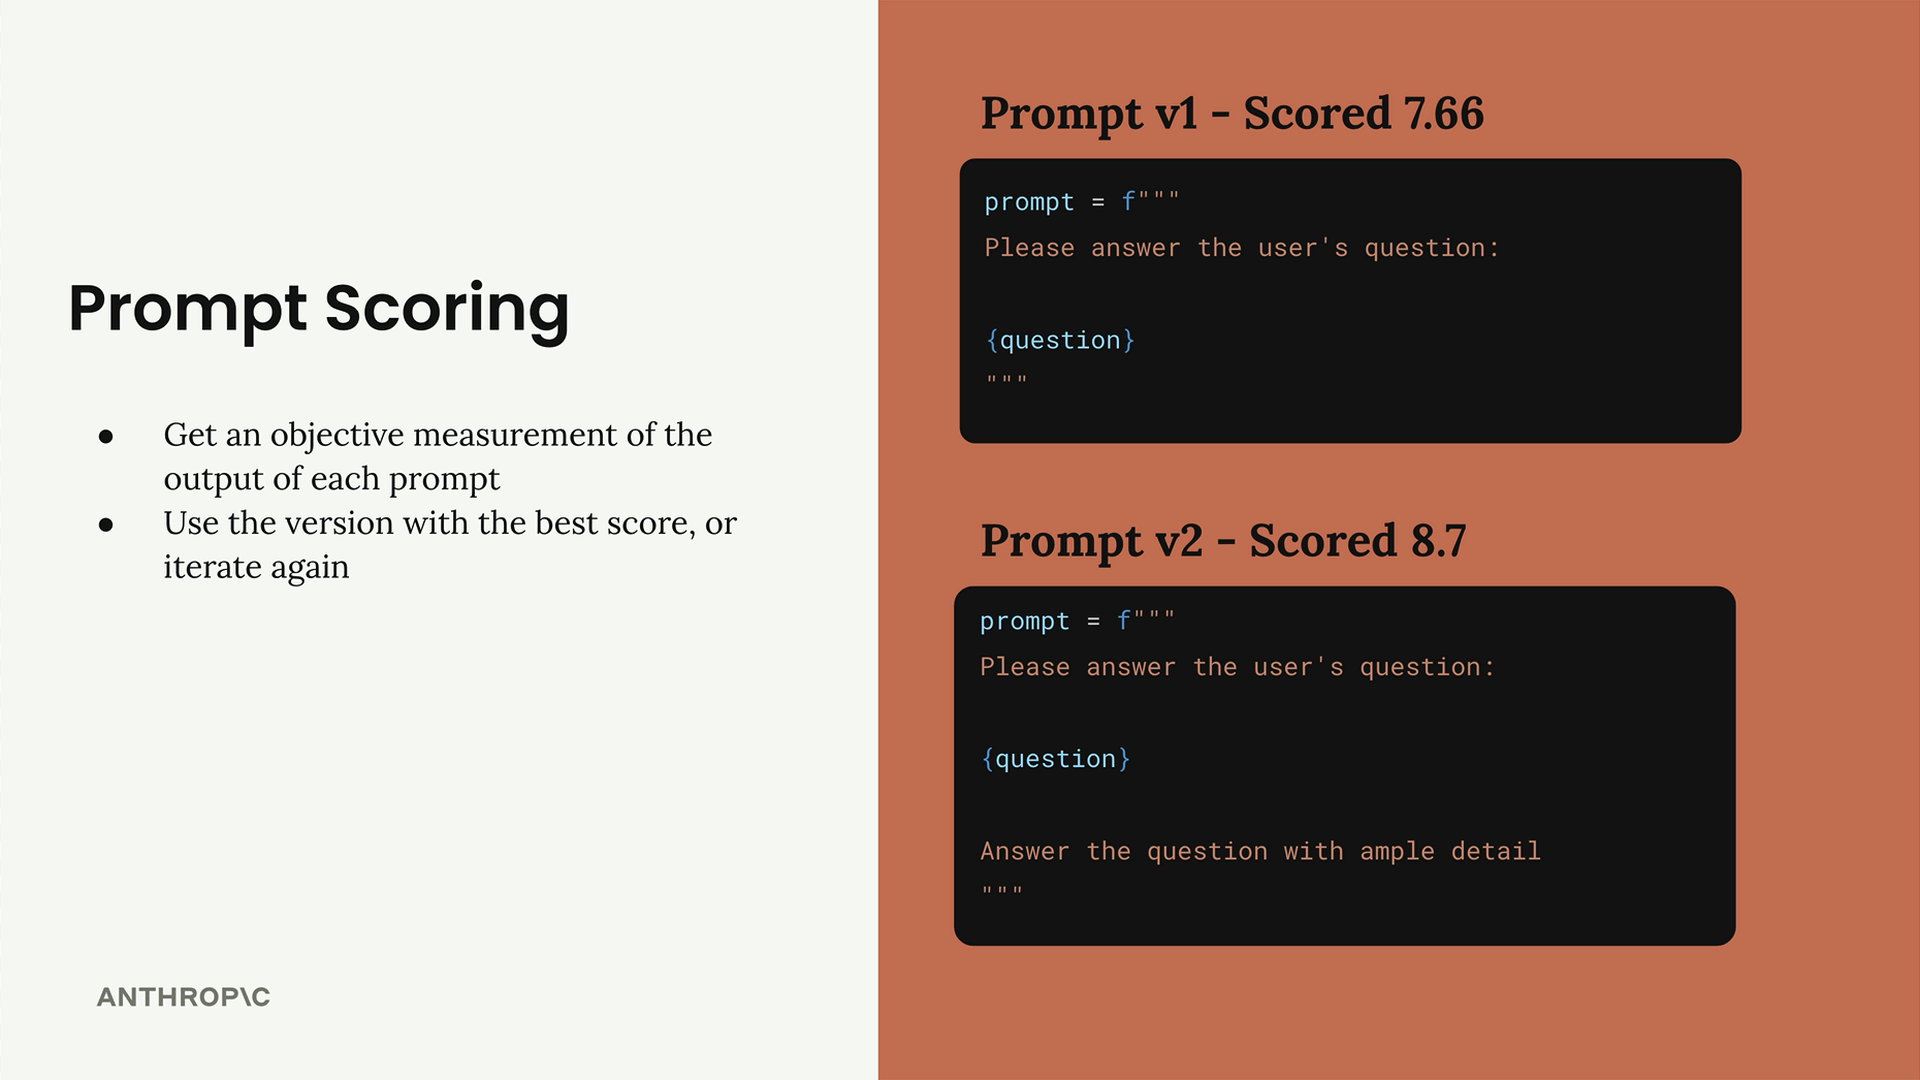
In our example:
- Prompt v1 scored 7.66
- Prompt v2 scored 8.7
The higher score for v2 suggests that adding "Answer the question with ample detail" improved the prompt's performance across our test cases.
This systematic approach gives you an objective way to measure prompt improvements rather than relying on subjective judgment. You can start with a simple implementation and gradually add more sophisticated evaluation criteria as your needs grow.
🔁 Related lessons
- Next: Generating test datasets
- Previous: Prompt evaluation
- Same section: Overview of Claude Models · Accessing the API · Making a request
- Part of paths: Path C
- Reference docs: Glossary · Skills atlas · By use-case
📚 Source & attribution
- Original Anthropic Academy lesson: https://anthropic.skilljar.com/claude-in-amazon-bedrock/276732
- © 2025 Anthropic. Educational fair-use only.