📖 Lesson content
Summary
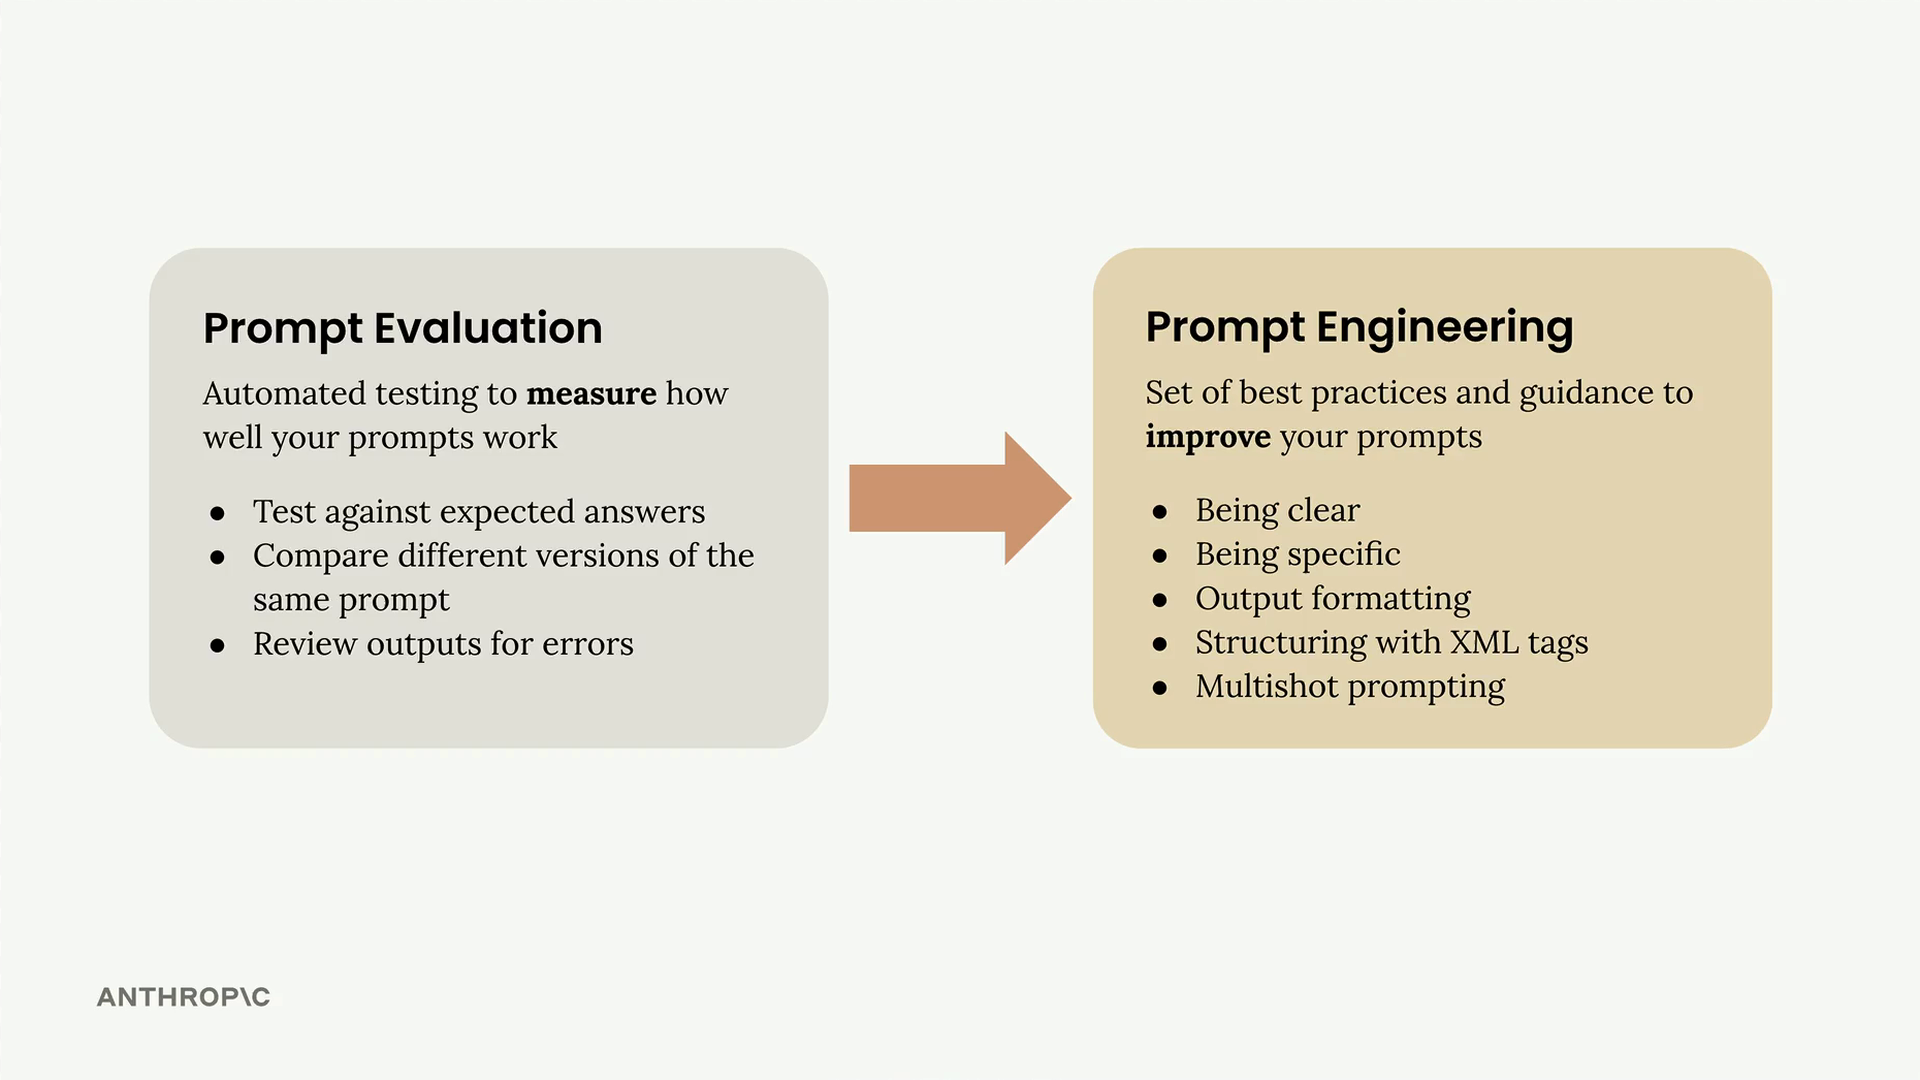
Prompt engineering is about taking a prompt you've written and improving it to get more reliable, higher-quality outputs. This process involves iterative refinement - starting with a basic prompt, evaluating its performance, then systematically applying engineering techniques to improve it.
The Iterative Improvement Process
The approach follows a clear cycle that you can repeat until you achieve your desired results:
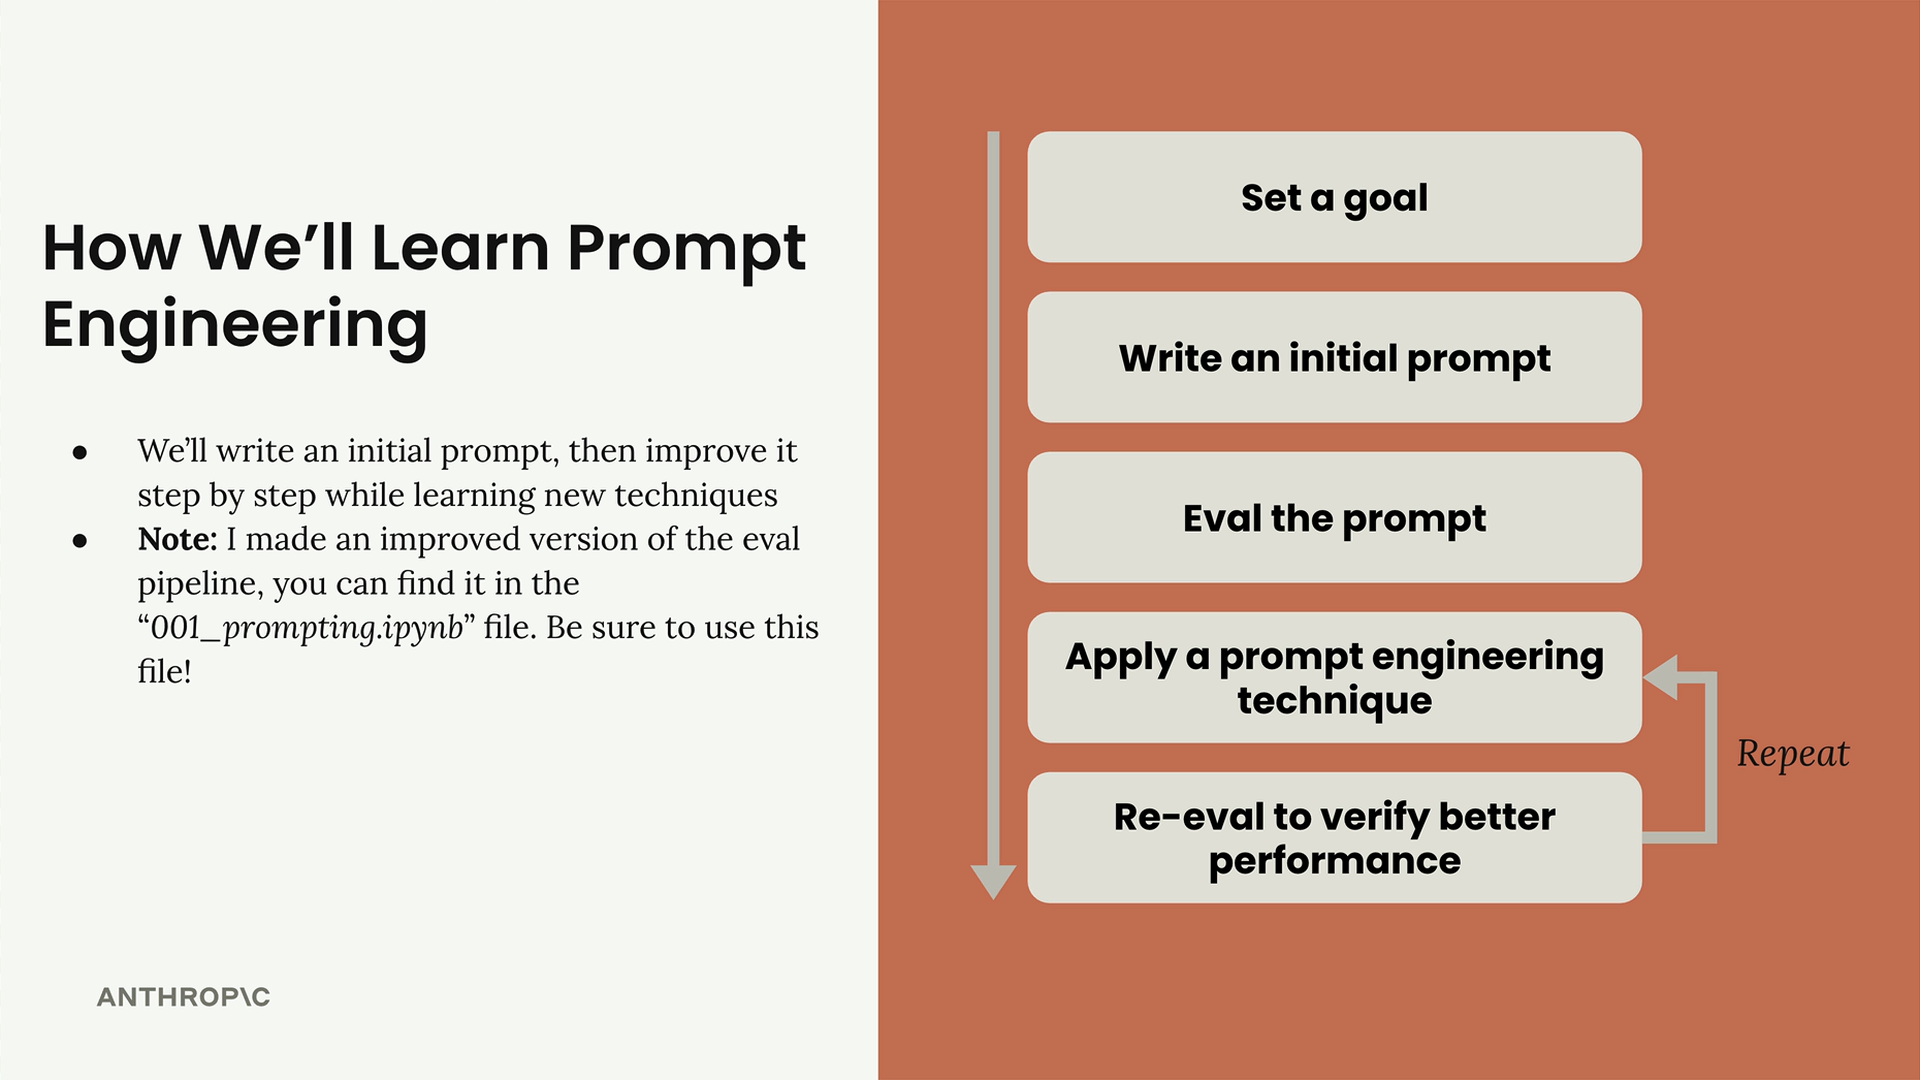
- Set a goal - Define what you want your prompt to accomplish
- Write an initial prompt - Create a basic first attempt
- Evaluate the prompt - Test it against your criteria
- Apply prompt engineering techniques - Use specific methods to improve performance
- Re-evaluate - Verify that your changes actually improved the results
You repeat the last two steps until you're satisfied with the performance. Each iteration should show measurable improvement in your evaluation scores.
Example: Meal Planning for Athletes
Let's walk through a practical example. The goal is to create a prompt that generates a one-day meal plan for athletes based on their physical characteristics and requirements.
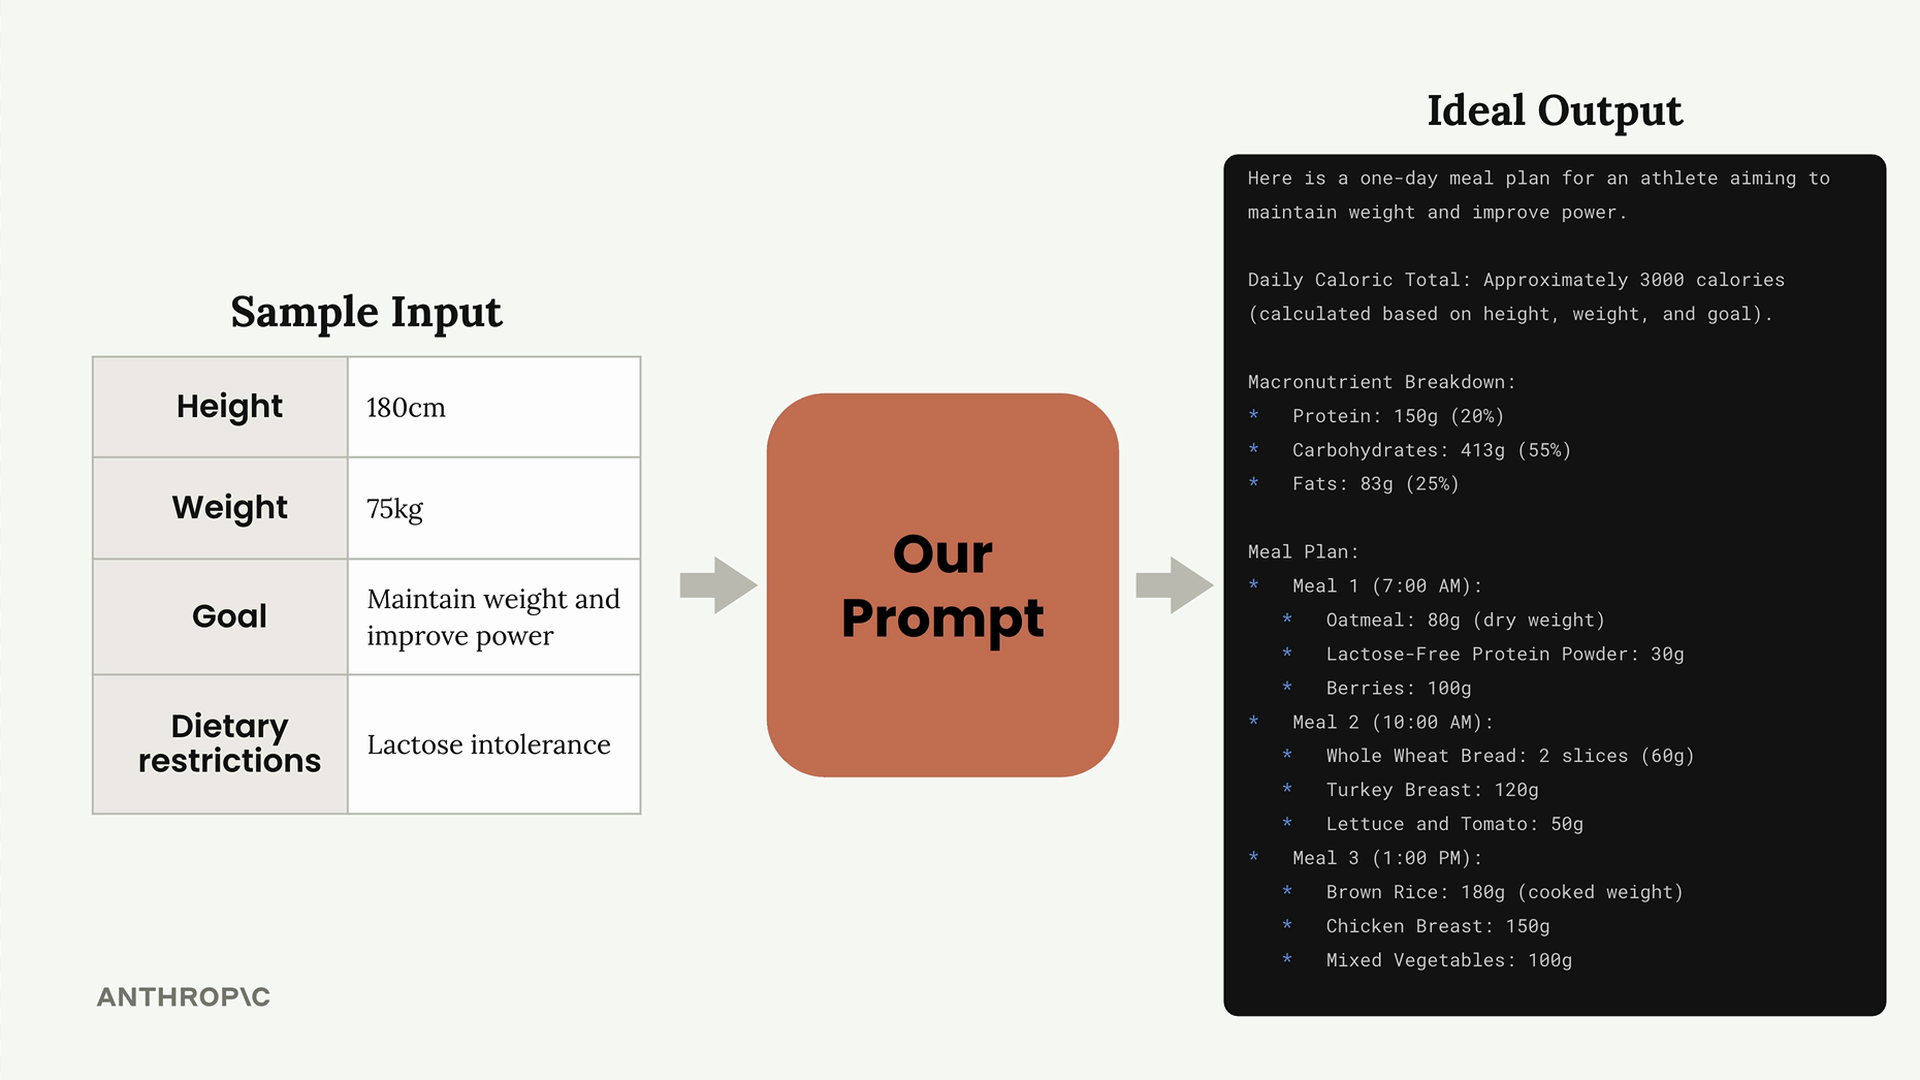
The prompt takes these inputs and should produce a comprehensive meal plan with caloric totals, macronutrient breakdowns, and specific meal details with portions and timing.
Setting Up the Evaluation Framework
To measure improvement systematically, you need a robust evaluation setup. The framework includes:
- Dataset generation - Create test cases that represent real-world scenarios
- Automated scoring - Use consistent criteria to evaluate outputs
- Performance tracking - Monitor improvements across iterations
When setting up your evaluator, be mindful of API rate limits. Start with low concurrency (1-3 concurrent requests) and only increase if you don't encounter rate limiting errors.
Creating Your Initial Prompt
Start with something simple, even if you know it's not great. Here's an example of a basic first attempt:
What should this person eat?

- Height: {prompt_inputs["height"]}
- Weight: {prompt_inputs["weight"]}
- Goal: {prompt_inputs["goal"]}
- Dietary restrictions: {prompt_inputs["restrictions"]}
This prompt is intentionally basic and will likely produce poor results. That's exactly what you want - a clear baseline to improve from.
Establishing Evaluation Criteria
Define specific criteria that your prompt should meet. For the meal planning example, good output should include:
- Daily caloric total
- Macronutrient breakdown
- Meals with exact foods, portions, and timing
These criteria help the evaluation model grade outputs consistently and give you clear targets for improvement.
Measuring Baseline Performance
Run your initial prompt through the evaluation framework. Don't be discouraged by low scores - a score of 2.3 out of 10 is actually perfect for a starting point. It gives you plenty of room to demonstrate improvement.

Analyzing Results
Most evaluation frameworks generate detailed reports showing how each test case performed. These reports typically include:
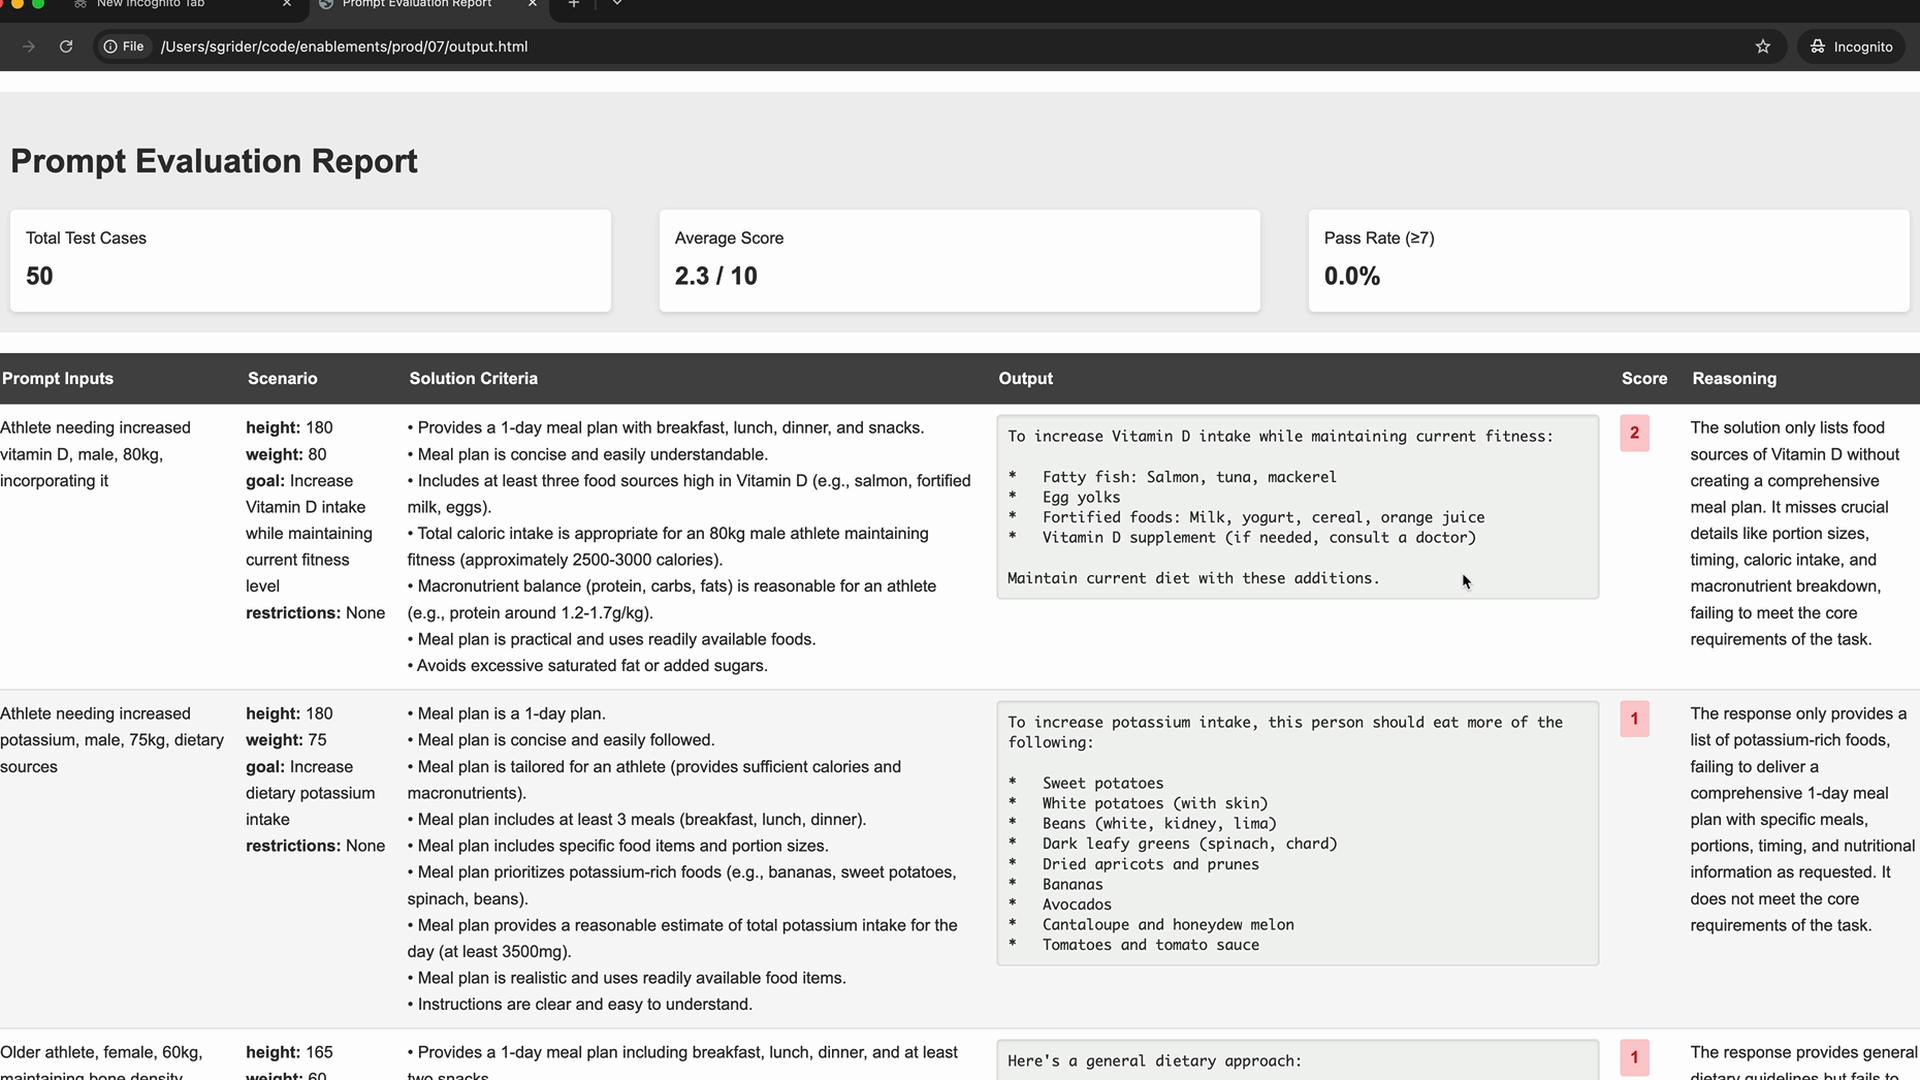
- Individual test case results - See exactly what the model produced
- Scoring breakdown - Understand why certain outputs scored poorly
- Reasoning - Get feedback on what's missing or incorrect
Use this detailed feedback to identify specific areas where your prompt needs improvement. Look for patterns across multiple test cases to understand systematic issues rather than one-off problems.
Next Steps
With your baseline established and evaluation framework in place, you're ready to start applying specific prompt engineering techniques. Each technique you apply should result in measurable improvement in your evaluation scores, moving you closer to your ideal output quality.
The key is to make one change at a time, evaluate the impact, then decide whether to keep the change or try a different approach. This systematic process ensures you understand which techniques work best for your specific use case.
Downloads
🔁 Related lessons
- Next: Being clear and direct
- Previous: Quiz on prompt evaluation
- Same section: Making a request · Multi-turn conversations · Chat exercise
- Part of paths: Path C
- Reference docs: Glossary · Skills atlas · By use-case
📚 Source & attribution
- Original Anthropic Academy lesson: https://anthropic.skilljar.com/claude-with-google-vertex/289169
- © 2025 Anthropic. Educational fair-use only.